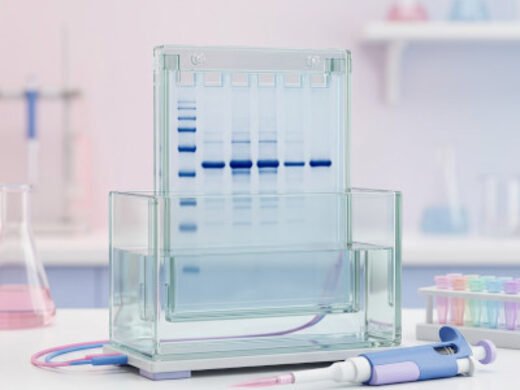
Top 10 tips for successful western blotting
Related on this site: See our western blot lysis and blocking buffer recipes. After imaging, quantify bands with the western blot densitometry tool.
Western blotting remains one of the most widely used techniques for protein detection and analysis. Despite its routine use in many laboratories, obtaining clean, reproducible, and publication-quality results can be challenging. From sample preparation to image acquisition, each step can significantly impact the final outcome. Everyone has their own method for running western blots. Ask ten different researchers how they run them and you will get ten different answers, which can be confusing if you’re struggling to get good western blot data. Here are ten practical tips that we use in the Bond Lab to ensure we get nice westerns.
-
1. Choose your primary antibody carefully
The quality of your primary antibody probably has the biggest impact on the quality of the western blot data you get. Primary antibodies are extremely expensive, often costing more than £400 for 100 μl, and sadly many are of poor quality. Some antibody suppliers consistently produce good quality antibodies that you can rely on to get good results. For example, Cell Signaling Technology antibodies are almost always fantastic. However, other companies have gained a reputation for poor quality and non-specific antibodies that should be avoided unless you have no other options.
Check the antibody datasheet for example blots produced with that antibody and look for publications that report using a particular antibody before making a purchase. Unfortunately, if you end up with a bad antibody there is not much that you can do to improve the blot results. Optimising blocking, washing, and antibody concentrations may help a bit, but in my experience you are better off looking for an alternative antibody.
-
2. Re-use primary antibodies
Because primary antibodies are so expensive you can often re-use the diluted working solution for multiple blots. To keep the antibody solution in good condition, make it up in TBS, 0.1% Tween 20, 2% BSA, and 0.1% sodium azide and keep the solution in the fridge. Don’t make up the primary in milk as the milk will go bad after a few days. Also ensure that you rinse off any traces of milk blocking buffer on the blot before you add the primary; otherwise residual milk from the blocking buffer will accumulate in the antibody solution and it will go off in a few days.
The number of blots you can get from an antibody dilution depends on the antibody and the abundance of the target protein on your blots. If you run samples with huge amounts of target protein, the antibody will get depleted more rapidly. However, we regularly manage to get at least two or three blots from a single batch of diluted primary antibody.
-
3. Wet vs semi-dry transfer?
Choose your transfer method based on your target protein. Semi-dry transfer is quick and convenient. However, it can be harsh for small proteins, which may get pulled through the membrane and out the other side. Some will stick to the membrane, but you may be losing a significant proportion. For very small proteins, for example less than 20 kDa, you may be better off with a slower, more gentle wet transfer.
Semi-dry transfer often struggles to get large proteins, for example more than 100 kDa, to transfer completely. For big proteins we regularly use an extended wet transfer, for example two to three hours at 400 mA. This gives complete transfer of large proteins.
-
4. Clean up your blocking buffer
The most commonly used blocking buffer is TBS-T containing 5% non-fat milk. Have you ever centrifuged this before adding it to your blot? If you do, you will find a sticky sludgy pellet of insoluble material that would normally end up sticking all over your blot. We recommend spinning your blocking buffer as fast as you can for ten minutes to remove the insoluble debris before adding the clean supernatant to your blot.
Also try heating your blocking buffer to about 50–60 °C in the microwave; this can denature the milk proteins and improve blocking.
-
5. Dry your membrane when analysing small proteins
When analysing small proteins, for example 10–20 kDa, it can often help to dry your membrane before probing. This can help fix the proteins onto the membrane and prevent loss of signal. After transfer, rinse the membrane in distilled water and air dry. Dried blots can be stored at room temperature for several days.
If you are using a nitrocellulose membrane you can rehydrate the blot in distilled water and carry on with blocking and probing. However, PVDF membrane is more hydrophobic (and better for binding small proteins) and will not wet in water alone. First wet the membrane in 100% methanol. Then slowly add water whilst rocking. Gradually add more water so that after about five minutes the membrane is in 100% water. Don’t put your nitrocellulose membranes in methanol!
-
6. Not all ECL reagents are equal
Although every manufacturer will try to convince you that their ECL reagent is the most sensitive ever and gives a signal for hours, the truth is that not all ECL reagents are equal. Choosing an ECL reagent is not where you should try to save on costs. Data from a good experiment is wasted if you cannot capture a decent image of your blot, and a good ECL reagent can make all the difference and rescue what might otherwise be a lost experiment.
In the Bond Lab we use two reagents. We use Immobilon ECL for our regular blots but also use Immobilon Ultra. The standard Immobilon ECL offers a good balance between cost and performance and we find that it is more sensitive than many of its competitors that we have tested. The Ultra ECL is more expensive but is about 100 times more sensitive. We have had many blots where no bands are visible with regular ECL but are easily detectable with the Ultra. This easily justified the extra cost of the Ultra ECL. Just make sure you have your sunglasses on!
-
7. Reprobing
Re-probing membranes often leads to progressively poorer quality blot images. If you have to re-probe a membrane, I recommend starting with the primary antibody that normally gives the weakest signal first and then re-probing with the stronger-signal antibody second. If the two proteins that you want to detect have quite different molecular weights, consider cutting the membrane horizontally between the two proteins and then probing each half of the membrane fresh.
If you need to re-probe with a second antibody, try to use antibodies raised in different hosts, for example a mouse monoclonal for protein 1 and a rabbit polyclonal for protein 2. After the first protein has been detected, rinse the blot in water and dry the membrane. This should kill any HRP activity from the first probing and, as the antibody for the second protein was raised in a different species to the first primary, the second round of secondary HRP-conjugate antibody will only pick up the protein 2 antibody and not the original primary.
-
8. Spin your antibody stock before use
When primary or secondary antibody stocks are stored for long periods of time, they can form aggregates that can stick to your blot and create a speckled background signal. Before you remove some of the antibody to make your dilution, microfuge the antibody for a few minutes to pellet any aggregates that may have formed. This can often prevent a blot being ruined by nasty speckling. An alternative is to pass the diluted antibody through a syringe filter to remove the aggregates.
-
9. Optimise antibody concentrations
Although optimising antibody concentrations can only achieve so much if your antibody is of poor quality, it is still worth trying a few different concentrations of primary. This can often push up blot sensitivity without significantly increasing background, or on the other hand it can help prevent blots from very quickly saturating when you have abundant target protein or a very strong signal.
-
10. Wash thoroughly
It is possible to not wash a blot enough, but you can’t wash a blot too much. Use generous volumes of wash buffer, change it regularly and often. I find many short washes (for example five or six three-minute washes) better than fewer longer washes (for example three ten-minute washes). If you still have visible background, try increasing the Tween-20 concentration from 0.1% to 0.2% or 0.3%. I also find that warming the wash buffer to 37 °C can often help clean up a messy blot with a high background, particularly if done with the higher Tween-20 concentrations.